Friday, April 27, 2018

The Mindful Bride: Part 1, Planning and Executing

I wanted to do this series on being a bride, mostly because I found my experience to be quite different than many other brides, but also to help others who may feel like they are going crazy with planning, executing, and trying to enjoy their wedding day. There are steps to health & wellness in the face of stress and change, and everyday life. Being a bride and planning a wedding is no different; It can still be busy-making, stressful, and time consuming, so we can't forget about our own wellness during this process.

Here is Part 1: Wellness Guidelines for Planning and Executing, which is more about maintaining a clear head, not getting overwhelmed, and picking your battles. Part 2 will talk about actual self-care and stress management.

***

When you're about to get married, other married people loved to give you friendly warnings about what all could and will happen on your wedding day. I was told, my wedding day would fly by! That I would barely get a chance to enjoy it; There will always be something that goes wrong or not according to plan... I listened nicely to all of these warnings but I still believed that I could influence my experience as a bride.

At my wedding a few weekends ago, I did just that. People told me I was the most organized bride they've ever seen. My florist commented several times that I was one of the easiest brides she's ever worked with. Even my photographers exclaimed that they wish every bride was like me. 

I don't want my ego spin out of control, but I had to reflect on all of this feedback. What was I doing that other brides weren't?!

I will admit that I was incredibly organized - but this was made easier when I decided how much "stuff" we needed for our wedding. Perhaps you have grandiose ideas with extremely specific visuals in mind... maybe you have family or traditional obligations that you have to bend to. The point was that my husband and I chose what was right for us, and we didn't go overboard.

Rule #1: Less is more
You might think that you need 2-foot tall centrepieces to create a proper atmosphere. I will tell you that you can get away with a lot less. I had short, skinny $2 vases from Ikea and 3 roses in each.
We could have gone overboard, which is why it's so easy to become overwhelmed. It's okay to take a few non-essential items off your plate!

Items that we passed on included:

- Specialty late-night food station. Instead the venue/caterers supplied fruit, cheese and crackers;
- Videographer. We had a family member record our first dance. It wasn't worth paying $4000 to someone to film the day for us; especially as we had made such a great connection with our photographer. Finding her took time and luck; and it was more intimate without a film crew hovering over us.
- Extra entertainment. We felt the only entertainment our guests needed was a loving ceremony, an excellent dinner, and a lot of dancing!
- Extra flowers. I asked that all the bouquets be half the size of a classic bouquet. It saved us a ton of money and no one even noticed. Remember, the bigger the bouquet, the more you/your dress is covered.
- Fancy lights or smoke machines. Extra equipment needs to be rented, delivered, set up, taken down... We were able to dim the lights at our reception after dinner. That with some amazing music (and an open bar) was all we needed to have an incredible party. No special slide shows, screens, flashing dance floor lights were necessary.
- A Calligrapher or specialty invitations. I hand wrote out all the addresses on envelops for our invitations, and I used VistaPrint for all of our stationary. We mailed out 2 cards and one return envelope. We had our directions and Inn booking information on the back of the invite. We saved paper and money! If you don't want to hand-write out your envelopes, use a label maker or your printer.
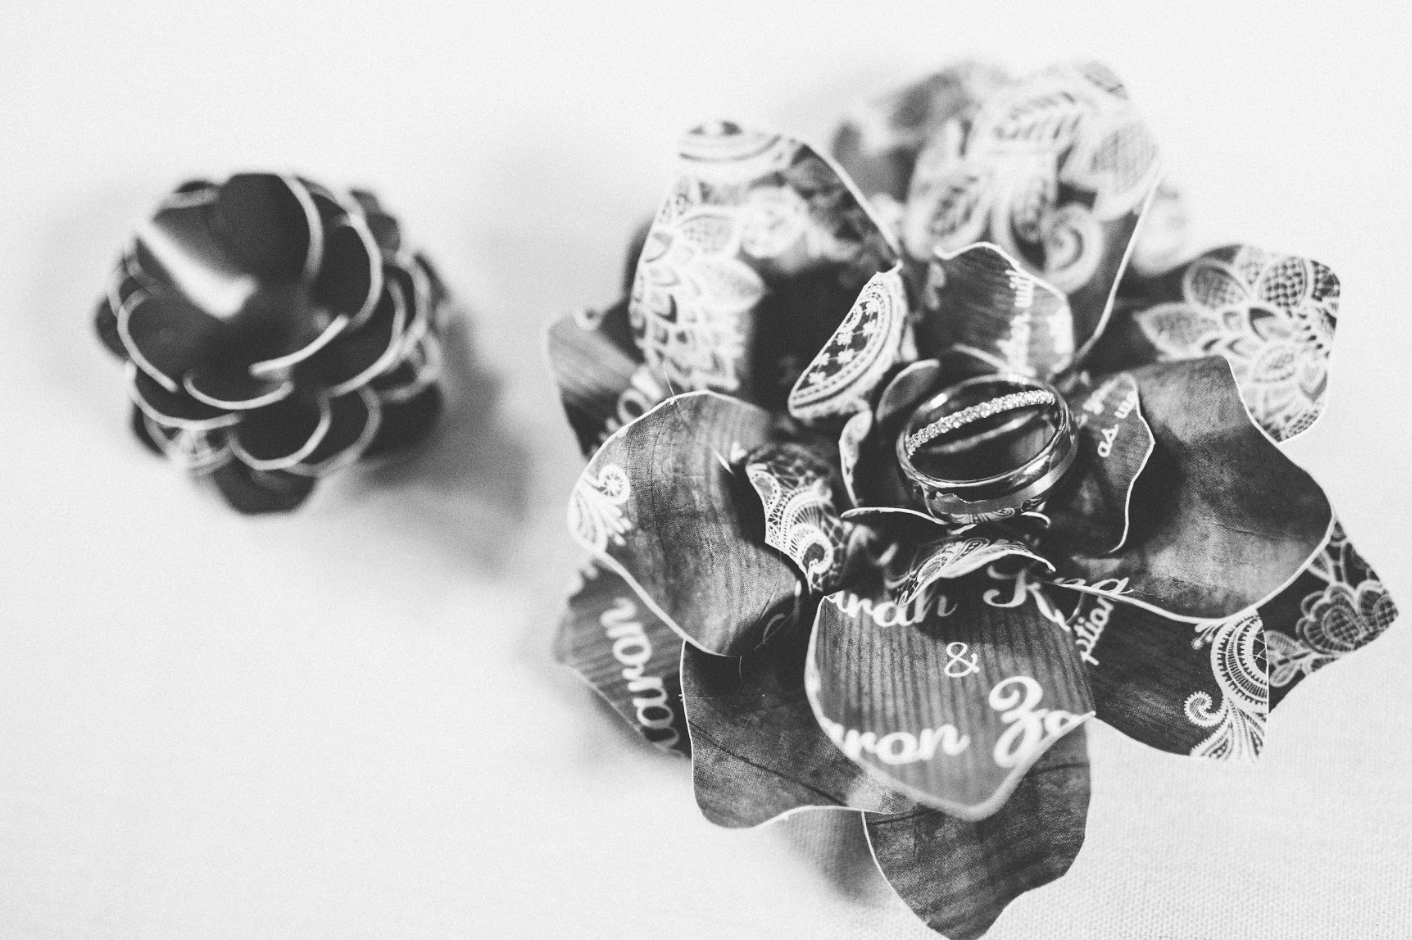
- Special DIY projects. I picked one and it was because I had made a huge mistake: I ordered twice as many invitations as I actually needed. I thought, How could I repurpose all of these card stock invitations? Then I remembered that my mom had recently bought me a book on making paper flowers. So I packed up the invites, drove to her house, and we spent a day together making flowers out of my invitations:
It started off fun, watching chick flicks and cliche wedding movies while we cut out dozens of stencilled petals... but by the end of the day we had only completed 10 flowers between the two of us. It was gruelling and time consuming. But the truth is that we were able to use them without needing 100 of them. They were accent decor, not "mandatory" at every table. I was totally happy with that... as were my blistered hands.

DIY projects are fun and great ideas in hindsight. Some of them might actually be quite doable. But don't feel like you need to put intricate work into something for every single guest - Unless you have the time, patience, and the passion for such a project.

It's okay if you want these things. It's your wedding and you can create the day however you like. But there are times when you need to let things go. They are seriously not worth it.

A friend of mine who is an incredible baker made cookies and brownies for the end of the night at her own wedding. Our venue allowed the same and I had planned on doing some baking for ours as well (otherwise what's the point of owning a Kitchenaid mixer?). But the week before the wedding my schedule got slammed - and not just with wedding stuff... but work, and family, and other commitments. I was exhausted and baking wasn't going to happen. At that point I really didn't care. I didn't even tell the venue until I arrived on the day-of. It wasn't a big deal, but I'm glad I made the decision to let it go.

Rule #2: Avoid overreacting. 

Things go wrong. People have very loud opinions and expectations.
Our planned outdoor ceremony ended up being moved indoors due to a freak ice storm in the middle of April. One of the worst storms in Toronto in years, with rain, freezing rain, snow, slush and ice all within 24 hours. We had an entire table not show up, and even our officiant was a little late to arrive. Shit happens. It wasn't going to stop us from getting married. Nothing would. There was no point in getting angry. We were still getting married, and everything in my eyes was still as perfect as it could be.

But even if something had gone wrong that was someone's obvious fault; there's nothing good that comes out of going full dragon. The important point is to keep a level head. Exhale a deep breath, and then find a solution. One of the best parts of being the bride? You have a team of people who are there for you to troubleshoot.

Our venue (which was also an Inn) made multiple errors with room bookings and didn't have the room I requested available for getting ready in. So as I had my manicure done, my sister went up to the front desk and fixed it all. I didn't stress for a second. The issue would be fixed, or we would somehow find a solution (or another room). There's always a way to make things work. The goal is to not fight the resolution.

And remember - you're getting married! This is a happy day of celebration and everyone is there in support of you and your partner! Create and nurture the positive energy that you want surrounding you on your day.

Rule #3: Let the experts do their job - and trust them!

So you shelled out a few thousand dollars on photography... perhaps hundreds if not thousands on flowers (You've seen these weddings on Pinterest!). There's a reason you're paying so much: You are paying a professional for their time and their skill. Sure, there's the cost of materials, but you sought out your specific vendors because you thought they were the best in your price range, and you seem to really connect with them.

I gave our florist an idea of what I wanted, with flower types and colours, but I honestly had no idea what was in season. She guided me to combinations that ended up being incredible. She put together the most beautiful bouquets, and they were all so simple and romantic. Even when it came to the ribbon around the stems, she made a recommendation and not only did I love it, but I trusted her that it would look amazing (and she didn't disappoint).

Trust your experts. Try to avoid harassing them with phone calls and emails with changes and demands. I'm not saying that you shouldn't stick up for what you want or what you're asking for, but keep an open mind and understand that these people work weddings for a living.

Even if it's not exactly as you had pictured it in your head, try to see the beauty in it. See the love and the handiwork that went into each piece from your vendors/experts.

Rule #4: Call upon your think tank, but avoid getting too many opinions

There were multiple times where I had to make silly little decisions (like, which font looks better for the seating chart?) and I got a little overwhelmed with indecision (mostly because I didn't care about seating chart fonts... I just wanted it to be legible for our guests). Instead of just picking something, I would call upon one of my bridesmaids, or my sister, or mom, or, if the decision was more crucial than fonts, I would bring in my fiancé. I would have 3-4 options ready, then I would ask 1-2 people for their opinion - never more than that. Any more opinions and you will second guess yourself, and now you're trying to please the crowd. Once a decision was made, we stuck to it and moved on.

There's no need to dwell on the tiniest details; but you're also allowed some help in making those decisions. Back to Rule #1: Less is more. You don't need your whole posse there for you when you try on wedding dresses or meet with your florist. Pick one person and enjoy the experience. If you find there's someone who's opinion on the matter would mean a lot to you, then go home and come back another day with that person.

For our wedding cupcakes I went by myself to put down the deposit and then brought home a few different varieties/flavours of cupcakes home for my fiancé so that he could help choose the flavour that we would serve. The point is that you don't have to do everything alone. It's okay to ask for help.

***

I understand that my situation will not apply to everyone, but I hope that these little tidbits of advice will help others beyond the typical "warnings" that women hear. A warning isn't always helpful but guidance on how to better manage the wedding planning and execution is. And that is my hope for today's blog post. I'll be posting again soon for Part 2: Self-Care for the Mindful Bride

Saturday, March 31, 2018

6 products that most women would do best to avoid

I recently saw the swag bag that's being given out for those who participate in one of the Women's runs, here in Toronto. Now, don't get me wrong, I love a good swag bag. It's one of the perks of running a race.

What grabbed my attention was the number of items in this "Women's swag bag" that can actually sabotage a woman's hormonal health. Maybe not dramatically or from a single use/consumption, but long-term, or for those who already have hormonal issues.

Here are a few examples of products that most women should avoid, while trying not to call out specific brand names.

1) Commercial brand granola bars
           These are often laden with sugar; Both in the number of types of sugar and in the grams per serving. Upon reading the ingredients label you'll notice that a single product can contain all of the following: Brown sugar, Honey, Glucose, Sugar, and Glycerin. That's 5 different "types" of sweeteners in a single granola bar (as listed by a specific brand), with 5g of sugar and only 1g of protein and only 2g of fiber per serving. Shouldn't a granola bar be high in fiber?
           Additionally, we find chemical preservatives like BHT, artificial flavouring, and "modified milk ingredients." On a scale of healthy snacks, this one shouldn't even be an option.

2) "Nutritional" or Meal replacement shakes
           It makes me sick that we actually feed these to people. Sure, they're fantastic for helping certain people gain weight, but that's because each serving contains roughly 40g of carbohydrates with 1/2 of that coming from multiple sources of sugar and even more added sweeteners.
         Additionally, there are multiple ingredients that aren't well tolerated, especially as we age. 
→ Carrageenan is what researchers in animal labs use to induce inflammation. It can also be a cause of headaches and migraines for some women. 
→ "Vegetable oil" often contributes to high omega-6:omega-3 ratios in the diet - meaning more inflammation. This can manifest as IBS, joint pain, painful periods, depression, and brain fog.
→ Milk protein concentrate. Not a terrible ingredient for the average person, but as we age we lose our concentration of available lactase enzymes. Thus, as we age, we become more lactose-intolerant to some degree. For women specifically, I often recommend avoidance of all or most cow dairy as it is a common aggregator of digestion issues, hormonal imbalances, and increased inflammation.

3) Vaginal lubricants and wipes
      Vaginal dryness can often be a sign of a hormonal imbalance of estrogen. Avoid products that contain:
→ Glycerin: a sugar that introduced vaginally can lead to a greater incidence of yeast infections. 
→ Parabens like ethylparaben, methylparaben, etc. These are known hormone disruptors. 
→ Polypropylene glycol can be irritating, especially to sensitive tissue.

4) Commercially branded Hair and Body products that contain:
→ Sodium lauryl/laureth sulfates: these are foaming agents that can dry out skin and can cause reactions for those with sensitive skin. 
→ Cetyl or Stearyl alcohols: avoid products that have alcohol near the top of the ingredient list if you have dry skin or eczema. Alcohol in creams or body products can be even more drying and cause eczema lesions to become painful.
→ Fragrance: fragrances that are not disclosed as essential oils are often synthetic and are known hormone disruptors. They can also induce headaches and other neurological symptoms, not just in the user, but in those around them. 
→ Parabens for the same reasons as above.

5) Anti-perspirants
       Using aluminum products to clog your sweat ducts stops you from being able to eliminate toxins from your skin in those areas. We're supposed to sweat. It's part of our homeostatic regulatory system, and part of the body's detoxifying system. If you're using products like the ones above, your body has to get rid of those chemicals like phthalates, and it does so through sweat, urine and feces. If you're excessively sweating, it's time to have the root cause evaluated. 
Read more on one of my previous blog posts and make your own deodorant! 

6) Tampons
    As a previous user, I can understand the frustration with me adding tampons to this list. But the problems that tampons can cause go beyond toxic shock syndrome. Tampons soak up everything they're in contact with; Not only menstrual fluid, but your natural vaginal secretions and discharges. This fluid is critical for maintaining proper vaginal pH (prevents you from getting bacterial vaginosis - itching, redness, and subsequent infections), keeping tissues moist and happy, and keeping your vaginal flora healthy. If you tend to get yeast infections frequently, stop using tampons all together. Some women who have other sensitivities or sensitive skin would also do best to avoid tampon use due to fragrances, bleaches and dioxins. 

The point here is to educate women and have people in general be more informed on the products they're purchasing and using in and on their bodies. 

Rick Smith and Bruce Lourie's book Slow Death by Rubber Duck discusses the environmental toxins that we expose ourselves to everyday, but also on the mechanisms our body has for eliminating them. It is an eye-opening read that I highly recommend. 

I also recommend EWG's webpage Myths of Cosmetic Safety for more information: https://www.ewg.org/skindeep/myths-on-cosmetics-safety/#.Wr_BWmYZNsM

Thursday, March 22, 2018

6 Ways to Prevent Knee Soreness and Injuries for Runners

So you wanna run, but your knees get too sore? I hear this frequently, and can understand the feeling. Most of the time, doing some training to start running can help but there are other considerations as well.

When I first started running I just wanted to get out there. I didn't have any accumulated running gear,  and I was hitting the concrete streets of Toronto. At first it was uncomfortable - like my body didn't quite understand how to run, or how to run properly. I thought I was in good shape, but my heart was racing, and I was sore!

Fast forward to today and my knees have become a non-concern. It takes conditioning, the right gear and the right type of run, but you too can run with less knee pain.

Here are my top tips for reducing the knee pain of running:

1) Wear really good running shoes and rotate them often.
        Purchase one pair of really great (and often more expensive) running shoes, but make sure to replace them within about 6 months - earlier if you're covering more distance in them. For runners hitting about 20-40km per week, your shoes might only last you 3-4 months. Or, you can purchase several pairs and rotate them frequently. Each pair of shoes will last longer in that way, though you may have to spend more in the short-term.

2) Strengthen your hips!
       You can relieve the strain on your knees by increasing the strength of your hips and glutes. This even extends into the pelvic cavity and low back as strengthening these muscle groups help to keep the body and joints more stable. Lunges, squats, hip adduction and hip abduction will all support this.
       Yoga can also act as a strengthening exercise for those muscles. Look for yoga videos or classes specifically tailored to runners. Christine Felstead has a great book called "Yoga for Runners" as well, and she often teaches at the annual Toronto Yoga Conference & Show.
       At the same time, beware of deep tissue work that can over relax major muscle groups. Using a foam roller on the legs - especially the IT band - is fantastic, and can help to decrease knee soreness. However, a really deep tissue massage of the low back, hips and glutes might actually set you back by a few days. It's not uncommon to feel a little too loose and wonky after a really tough massage, so be prepared to restrengthen those muscle groups.
   
3) Avoid running on concrete.
        Cement has very little give for a runner compared to a trail. If you can run on softer surfaces, opt for that! With a slightly lesser impact, your joints feel less of a shock. Myself personally, I find that I'm more sore the day after I've run on concrete versus a dirt trail or boardwalk.

4) Run with a mid-foot strike, or on the balls of the feet. 
       Running with a heel-strike may look good in an advertisement, but mechanically is murderous on your legs. When you strike with your heel, the impact of that strike shoots up the leg with a more compressive force on the knee and hip joints. By using the mid-foot or balls of the feet, the back half of your foot acts as a sort-of shock absorber. This allows you to bounce more gently, taking the pressure off the knee joint and putting it more on your muscles to catch you and propel you forward.
       The only downside to this is that some newer runners may notice shin splints when starting this technique. Doing a proper warm-up and post-run stretch can help alleviate that stress. As can magnesium, foam rolling, and using hot and cold water therapy as appropriate.

5) Consider additional joint support via supplementation. 
       Depending on your age and physical and medical history, this might include cartilage helpers like glucosamine and chondroitin; anti-inflammatory substances such as Omega-3 fish oil and curcumin; or other vitamin, mineral, and amino acid support such as vitamin C, hydrolyzed collagen, and bone broths.

6) Visit a physiotherapist
       If you're unsure about your running technique and you're getting pain or soreness, it might be time to go see a physiotherapist. They can assess your gait and stance, perform muscle testing, and then set you up with stretching and/or active motion exercises to reduce your pain and support proper body mechanics. (If you have insurance benefits for physio, this one is a no-brainer!)

Wednesday, March 14, 2018

How to properly take care of your feet

Our feet take us everywhere. Some of us stay on our feet all day, giving them the burden of our entire body against gravity. A lot of us love shoes, and often shove our feet into any pair that pulls at our fashion-heartstrings; But how much extra care do we take of our feet? I'm talking beyond the aesthetics of and the stress-relieving massage of a good pedicure.

Taking care of our feet can relate to taking care of the entire body. It comes down to the "use it or lose it" theory: Any muscle or combination of functions that aren't used after a period of time will degrade or atrophy. To make the body stronger, we have to use it; use our muscles, use our brain power, etc.

Think about how often you use your feet while they are bare, on a flat supportive ground, compared to when they are sheltered or braced by thick socks, cushioned running shoes, or constricting high-heeled shoes. How often do you get to feel your toes splayed out rather then squished together?

There are 19 different muscles in the human foot, and over 100 ligaments! And especially important ones seeing as how they support us while standing, propel us while walking, and catch us while running.

More of us could do with a little foot conditioning. Properly taking care of feet includes strengthening them, preventing the muscles from atrophying, and protecting other joints such as the knees, hips and all the muscles in-between that have to compensate when we have weak feet and ankles.

How can you better take care of your feet and lower body?

1) Spend more time barefoot. 
Being barefoot connects you to the ground. You can do it within your home, but it's even more beneficial if done on the earth or grass. There are actually mental health benefits to walking barefoot through dewy grass! Grounding also helps bring you to the present. It literally connects you to the ground and can be a part of a mindfulness exercise.

2) Yoga
 Yoga is an incredible practice into strengthening your feet. Allow the toes to spread wide. Plant your feet and/or practice your balance postures. A yoga practice can be a fantastic way to strengthen your feet and whole body.


3) Other exercises and recovery. 
For injuries such as plantar fasciitis, work to stretch and strengthen the feet by drawing out the letters of the alphabet with your feet/toes (one foot at a time), then roll a frozen water bottle or lacrosse ball under your foot between the heel and the balls of the feet. Drawing the alphabet requires you to use multiple muscles of the foot, while the ice or ball will help to loosen tissue stiffness, adhesions and will reduce inflammation (with ice).

4) Ditch the high heels
High heeled shoes are a menace for your feet, knees and hips. They can completely change the body's posture, and put more strain on the lower body. Additionally, most high-heels require the toes to be compressed together, completely eliminating their function in balancing the body, while significantly affecting blood flow to the feet and toes.

5) Foot massages and Epsom salt foot baths
For extra pampering, give yourself a quick foot treatment. Forget the nail polish and just give yourself (or get someone else to help you) a foot massage. Knead into your arches, and gently traction the toes. You can even precede this with a foot soak in Epsom salts to help relax the muscles of the foot (soak for a minimum 20 minutes).

Give your feet the attention and love they deserve. And even more, keep them strong so that they can prevent injuries in other parts of the body.

Friday, March 2, 2018

Changes in Digestion: Hope for those with IBS

I was trying out two new recipes last night: one was a Moroccan-style chicken stew (done in the slow cooker), and the other was this insanely good lentil recipe from "Oh She Glows, Everyday"

Three things crossed my mind during this process:

1) Is this stew going to be as good when I transform it into a "Low-FODMAP"-friendly recipe? With no onions or garlic??

2) Will these recipes taste as good if I omit the sugar (maple syrup, honey, etc) in both of them?

3) I can't believe I can eat lentils! This is amazing and weird at the same time; like when I brought back white potatoes into my diet a few months ago. 

First off, onions and garlic bring loads of flavours and health benefits to our food, so not being able to enjoy them - and even more accurately, having them exacerbate my IBS symptoms - has been a real struggle; for both cooking at home (especially for a fiancé who LOVES both garlic and onions) and when we dine out.

Staying disciplined as much as possible is not only empowering, but you're preventing the pain that these food compounds cause. Pain is a signal telling us that something is wrong in the body. And it's a signal that we shouldn't ignore.

For those with food sensitivities or reactions, you absolutely can omit ingredients that aggravate you, and still have amazingly tasting food. Both dishes turned out incredibly well, considering what was missing. In this case, the added sweeteners were completely unnecessary.

Secondly, our bodies change as we age, and what worked for you in the past may not work in a few months or years. I spent about a year on a strict paleo diet and loved it! I had a hard time digesting potatoes and legumes (in addition to gluten and dairy), so paleo was the perfect solution for me. Even my "hangry" moments decreased in frequency.

Fast forward 6 years, after the inclusion of gluten-free grains back into my diet:  My once great digestion had returned to being stormy. My body was giving me distinct signals that something was terribly wrong and that the foods I was eating were aggravating me. I had a gut feeling (pun intended) what was causing it... sugars, including certain fruits and honey, onions, garlic, cauliflower, and even too much sauerkraut which I thought was supposed to be a great fermented food for gut health. It bothered me that these things that I had eaten for so long were now a huge issue for me.

Following up with my IBS research and treatment protocols, I realized that all of the foods I was reacting to were high in FODMAPs (Fermentable Oligosaccharides, Disaccharides, Monosaccharides, And Polyols), and started my plan to follow a low-FODMAP diet. This wasn't an easy feat. This is a crazy strict diet but I was tired of suffering.

And the truth is that I feel so much better than I did just 4 months ago, but it's not easy for many of us to completely change our diets. We get caught in habits and knowing what we have to give up can really bring a person down. It is absolutely a challenge.

But my point is that the gut changes over time. Pro-inflammatory and anti-inflammatory pathways always exist in the body, but we can modify their activation. The gut itself is a type of semi-permeable barrier that can become damaged. Our GI tract is like a whole other world, containing trillions of bacteria, all living within us. These are living organisms that secrete molecules that our body uses or obtains a signal from. They feed on what we ourselves are eating. There are so many factors involved that can change what your body reacts to and how it reacts.

There is always hope for IBS. There is always a chance that you may be able to eat things in the future that you're not able to now. But remember that there is a purpose for these signals - your symptoms - and it's your responsibility to truly listen to them and then modify your diet to best serve your body. Not only will your overall health improve, but you will actually feel better acutely. Seriously. Imagine eating a delicious meal and not feeling bloated, gassy, or having abnormal or painful bowel movements. That's what you have to look forward to :)

Thursday, February 22, 2018

Making your own non-toxic deodorant

Looking to make your own non-toxic deodorant? Want a product that's safe on your skin, composed mostly of moisturizers, with no artificial or synthetic fragrances? Today I whipped up a batch of homemade deodorant; A recipe that I've been using now for years with great success. Of course, every body is different, but this formula is a great starting point for those with sensitive and/or dry skin.

First, let's briefly go over the differences between a deodorant and an antiperspirant:

Deodorants help to prevent or eliminate body odor. They often contain baking powder, or other substances that help to eliminate bacterial growth and/or eliminate odours from bacteria.

Antiperspirants prevent sweating. They contain aluminum complexes (the active ingredient) that induce blockages of sweat ducts. No sweat, no smell.

There are 2 main problems with antiperspirants:

1) Your body is supposed to sweat. This is one way we eliminate and get rid of detoxified metabolites such as phthalates. Sweating when the body is heated (when exposed to heat via weather sauna, or during exercise) is a part of a normal, healthy, functioning body.

2) The safety of aluminum-containing products is still a little uncertain. Several studies have suggested that aluminum exposure (the active ingredient in antiperspirants) may cause toxicity in humans. Patients with Alzheimer's disease have been found to have higher amounts of aluminum in the brain, but it's unknown whether the aluminum is a "cause" or factor in the progression of dementia, or, if aluminum build-up is a sequelae of having dementia. It is still to be determined how much of a risk comes from antiperspirant use, but the idea of using aluminum to block sweat ducts is still unnerving.

What's the solution? Making your own deodorant! It's simple to do, and can be very cost-effective (especially if buying ingredients in larger sizes/bulk.).

Here's what you'll need:

  • Baking soda
  • Arrowroot powder/starch
  • Coconut oil
  • Shea butter
  • Essential oil(s) of your choice
  • 2 non-plastic bowls: one that can fit inside the other 
  • A stirring spoon and/or tablespoons
  • 2oz or similar glass container/jar with lid. 

Directions:

1.   Measure about 2 tbsp of shea butter and 1.5 tbsp of coconut oil and add both to the small bowl. Pour about 1/2-1 cup of HOT water into the large bowl and set the smaller bowl inside. This is to melt the oil - but don't allow any water into your small bowl with the oils. Continue to stir the oils together until they are both melted.

2.    Remove the small bowl from the water bowl and add about 8-10 drops of your essential oils. In today's batch I mixed 6 drops of Jasmine with 4 drops of Lavender.

3.    Add in 2 tbsp of the Arrowroot starch and about 1-1.5 tbsp of baking soda. Mix well. 

4.   Pour mixture into your small glass jar and fasten the lid on. Place the jar in the fridge or freezer for a few hours or overnight to re-solidfy the oils. 

5. That's it! Use a skinny popsicle stick to obtain a dab of your new deodorant from its container and apply with clean fingers/hands to prevent contamination. Because we're not adding any preservatives, it's important not to "double-dip" into the jar. Always use a clean stick and clean fingers.  


Friday, February 16, 2018

How to trick yourself into doing something difficult and loving it

Today I woke up with this feeling that I wanted to run hills today, and I wanted it to be a long run. I visualized what that would look like: What trail would I be happy on? What would that journey look like? And then I went out, knowing I was going to hammer out a minimum of 8km, but with a goal of 10km, starting at the end that has the greatest rises and falls in elevation. How did it go?

I did it. Of course I knew I would because I've play this same psychological game with myself every single run. The game is:

How to trick myself into doing something difficult and love it. 

Step 1: Figure out what your goal is. Listen to your body and your emotions and figure out what it is that you need. I have some days where I need to challenge myself with hill training. I have other days where I want a flat and easy path. I have days where I want a long but slow run where I can take my time, not caring about speed, but only the distance.

There are times I want solitude, and other times where I don't mind running into other people. There is typically an option for every mood and every need. If you're not a runner, that doesn't matter - you can still follow these steps for whatever your workout activities and goals are.

Step 2: Visualize the activity. Steps 1 and 2 can actually occur at the same time. It may sound hippie-dippie but the psychology behind visualizations are extremely important and lead to more positive outcomes. Before any run, I literally go through in my head what that experience is going to look like. I picture myself on the trail, moving along, in each section, hills, valleys, areas that have uneven or difficult terrain... everything. If I'm not satisfied that a particular route will be fulfilling for me that day, I try another route or another trail and see if that fulfils my goal. But the practice of mentally going through the route/routine prepares me for what I'm about to do.

Once I've made my decision and set my goal, it's set. Time to get ready.

Step 3: Get your gear on and make sure you're prepared. This step involves what I consider to be the "point of no return." Once I'm in my workout or running gear, there's no way I'm not going out. Even if it's pouring rain out, I know I'll still be glad I made the effort and got out there, but I'll dress appropriately for the weather. In this case, it also helps to visualize finishing your goal. For me, that means a yummy protein shake waiting for me at the end, a nice hot shower, warm fresh clothes and then a really awesome big meal (typically breakfast), all that will accompany my sense of accomplishment, feeling strong, and a runner's high. It's a pretty epic deal.

Step 4: Be comfortable being uncomfortable. Exercise isn't always going to be easy. It's not suppose to be. That's the whole point: you're training your body. But this is also an exercise in mental strength as well. Get yourself into a groove, relax your body where you can, and hold strong the areas that require your power (ie. for running, it's my core and hips that I hold strong, while my upper body is relaxed.) During the tough spots, tell yourself not to quit. You can quit if you want to... a lot of people do... but that doesn't have to be you. Can you go another minute? Another 5 minutes? Longer? Do you need to quit, or are you just tired of being uncomfortable? This is the game I play in my head: realizing that I don't need to quit yet. Get comfortable in your stride, get comfortable in your body, even though you're working hard! Then once you achieve your goal, you'll feel huge sense of pride and accomplishment.

Step 5: Always take that moment after you finish a workout or run to appreciate what you just did. Savour that moment. Stretch out your body and feel every single muscle. Feel your breath, and just how easy it is to breathe again. Enjoy every aspect of what you just did, and give yourself a high-five (not kidding, I do it all the time... when no one else is around or looking). Remember how good this feels. That way, next time, you can reflect back on this experience and let that be a driving force for repeating steps 1-4.